How to Connect Google Ads account for lead generation in Kylas?
Prerequisites
Before setting up the integration, ensure the following profile permissions are enabled:
Lead Management → Read, Read All, Update
Company → Read, Read All, Note
Contact → Read, Read All, Update
Pipeline → Read, Read All
User → Read
Additionally:
You must have access to a Kylas Tenant Account with API access.
You must have access to Google Ads Lead Form Extensions.
Table of Contents
Introduction
Prerequisites
Step-by-Step Setup
Enter Kylas API Key
Create Webhook URL
Field Mapping
Google Ads Webhook Setup
Sync Logs
Key Notes
Conclusion
Introduction
Prerequisites
Step-by-Step Setup
Enter Kylas API Key
Create Webhook URL
Field Mapping
Google Ads Webhook Setup
Sync Logs
Key Notes
Conclusion
Step-by-Step Setup
1. Enter Kylas API Key
Go to the Google Ads Lead Integration App.
Navigate to the “API Keys” section.
Enter your Kylas API Key (you can generate this key from your Kylas account under Developer Settings → API Keys).
Go to the Google Ads Lead Integration App.
Navigate to the “API Keys” section.
Enter your Kylas API Key (you can generate this key from your Kylas account under Developer Settings → API Keys).
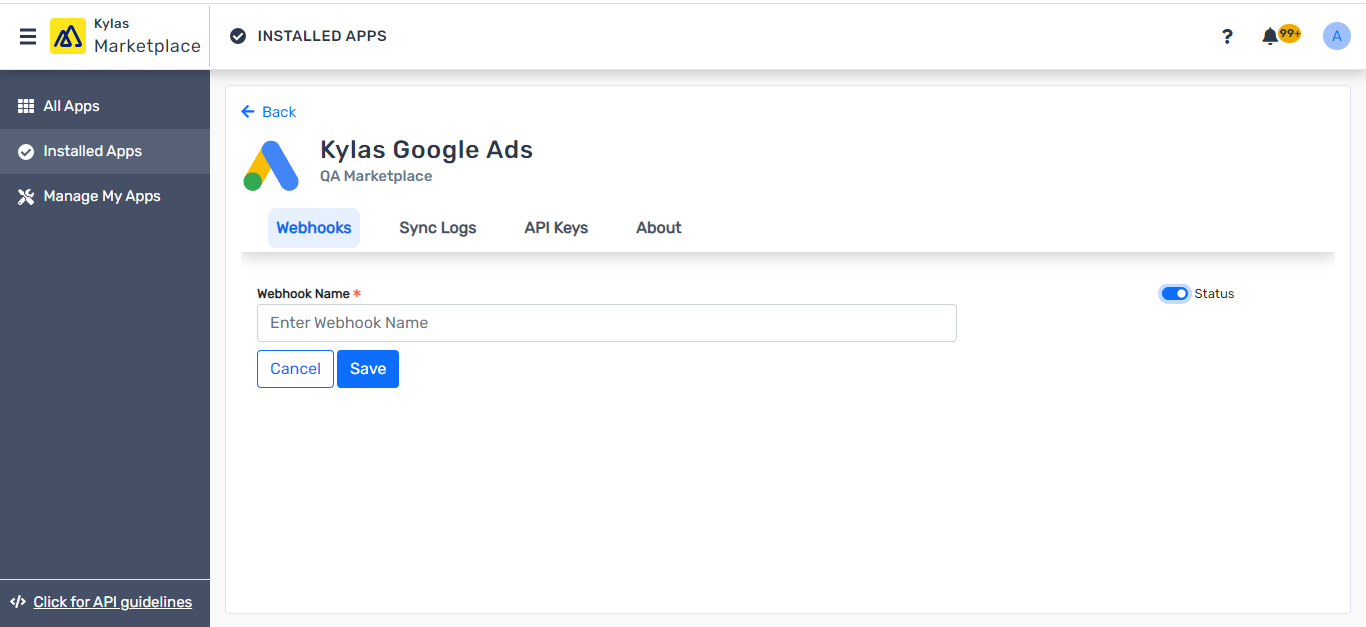
2. Create Webhook URL
Navigate to the Webhooks section.
Click “New Webhook”.
Enter a Webhook Name.
Toggle the Status ON to activate it.
Click Save.
Navigate to the Webhooks section.
Click “New Webhook”.
Enter a Webhook Name.
Toggle the Status ON to activate it.
Click Save.
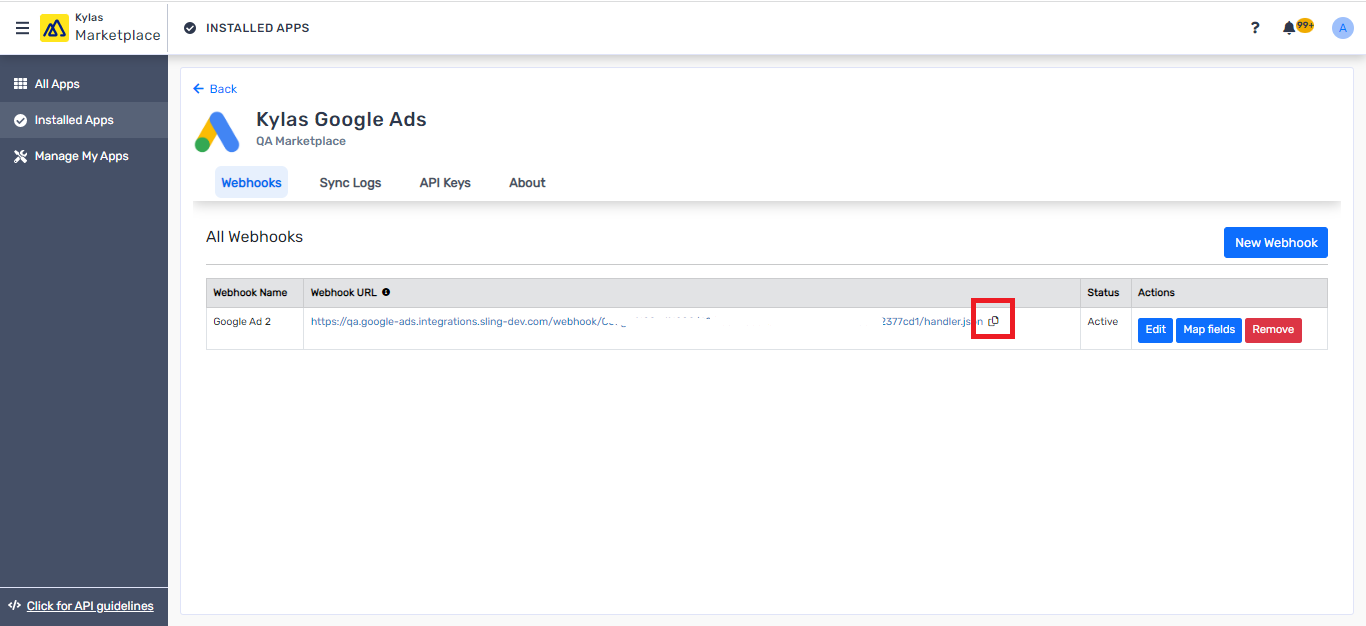
➡️ A Webhook URL will be generated. You will be redirected to the “All Webhooks” listing page.
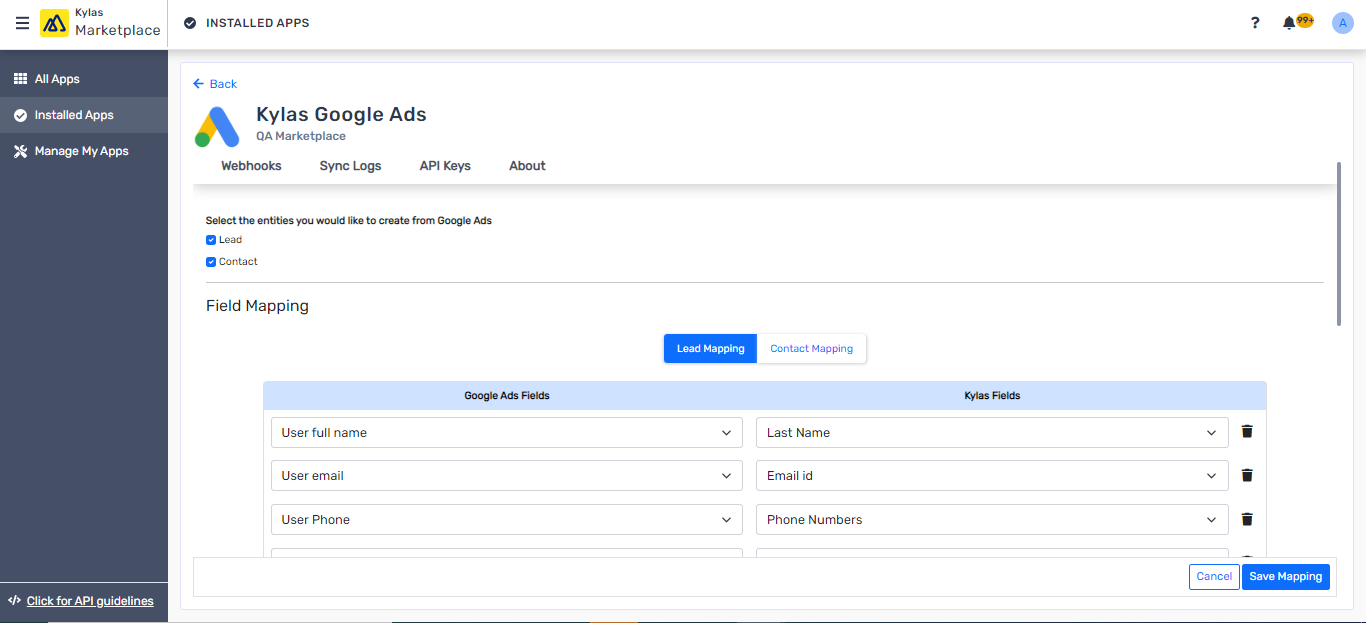
3. Map Fields
To ensure data from Google Ads forms is accurately stored in Kylas:
Click “Map Fields” in the integration app.
Choose the entities you want to create in Kylas:
Lead
Contact
Map each Google Ad form field to its corresponding Kylas field:
Ensure field types match (e.g., text, number).
You can also assign fixed fields for metadata such as:
Source
Campaign
Product/Service
Owner
UTM fields
Click Save once all mappings are completed.
✅ Proper mapping ensures smooth data syncing and minimizes field-type mismatch errors.
4. Setup Webhook in Google Ads
Now, link the Kylas-generated webhook to your Google Ads Lead Form:
Copy the Webhook URL from the app.
Go to Google Ads → Select your Lead Form Extension.
Add the Webhook URL under the form’s settings.
Pass a test lead to verify the integration.
Check Kylas CRM to confirm if a Lead or Contact is created automatically.
For reference, follow Google’s official guide on https://support.google.com/google-ads/answer/9423234?visit_id=638891153865475465-3226903038&rd=1
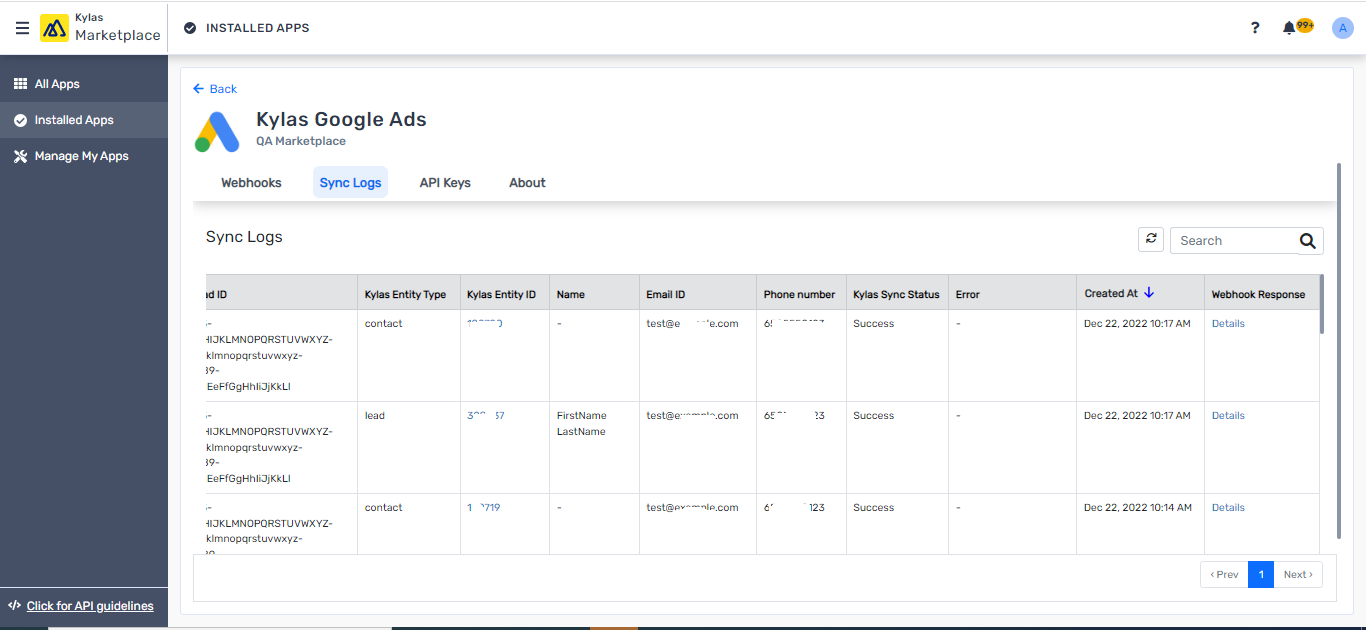
Go to Sync Logs.
View the list of incoming leads and their creation status in Kylas.
If any errors occurred, the Error column will show the reason.
Click “Details” to view raw form data received from Google Ads.
5. View Sync Logs
The integration app provides visibility into data syncing:
Key Notes

Ensure field type compatibility when mapping (e.g., don’t map a number field to a text field).
Multiple forms can be connected by generating unique webhooks for each.
Kylas workflows can be configured post-lead creation for automation.
Only forms with webhook capabilities (Lead Form Extensions) are supported.
Conclusion
-
Capture leads in real-time
-
Automate lead assignment and follow-up
-
Track campaigns more efficiently
-
Eliminate manual data imports
With a simple setup and powerful field mapping, this integration becomes an essential part of your lead generation and conversion workflow.
Related Articles
How to connect a apollo.io for lead enrichment in Kylas?
Prerequisites Profile Permissions: Lead -> Read, Read All, Write, Update, Update All permission Contact -> Read, Read All, Write, Update, Update All permission Company -> Read, Read All, Write, Update, Update All permission Pipeline -> Read, Read All ...How to Install and Connect Shopify with Kylas CRM
Table of Contents Prerequisites Step 1: Installing the Shopify App Step 2: Connecting Your Shopify Store Step 3: Mapping Shopify Fields with Kylas Step 4: Setting Up Event Triggers Step 5: Viewing Synced Information and Logs Step 6: Adding and ...How to Integrate Kylas CRM with Your IndiaMART Account to Capture the Leads
The IndiaMART integration enables you to automatically capture leads generated from your IndiaMART account directly into Kylas CRM in real-time. This integration eliminates the need for manual data entry, ensuring that no inquiry is missed. With the ...How to Send Bulk Emails from Mailchimp to Leads in Kylas CRM & How to Connect Mailchimp
Sending bulk emails is an essential part of lead nurturing, customer engagement, and marketing automation. Mailchimp, a widely used email marketing tool, allows you to design, manage, and automate bulk email campaigns with ease. When integrated with ...How to send Kylas Leads and Contacts to your Lemlist account for marketing campaign?
What is Lemlist? Lemlist is a versatile outreach tool for personalized email and LinkedIn marketing campaigns. With this integration, you can easily pass leads or contacts into your Lemlist account. It allows you to run multichannel campaigns, ...